


Description
Key Features
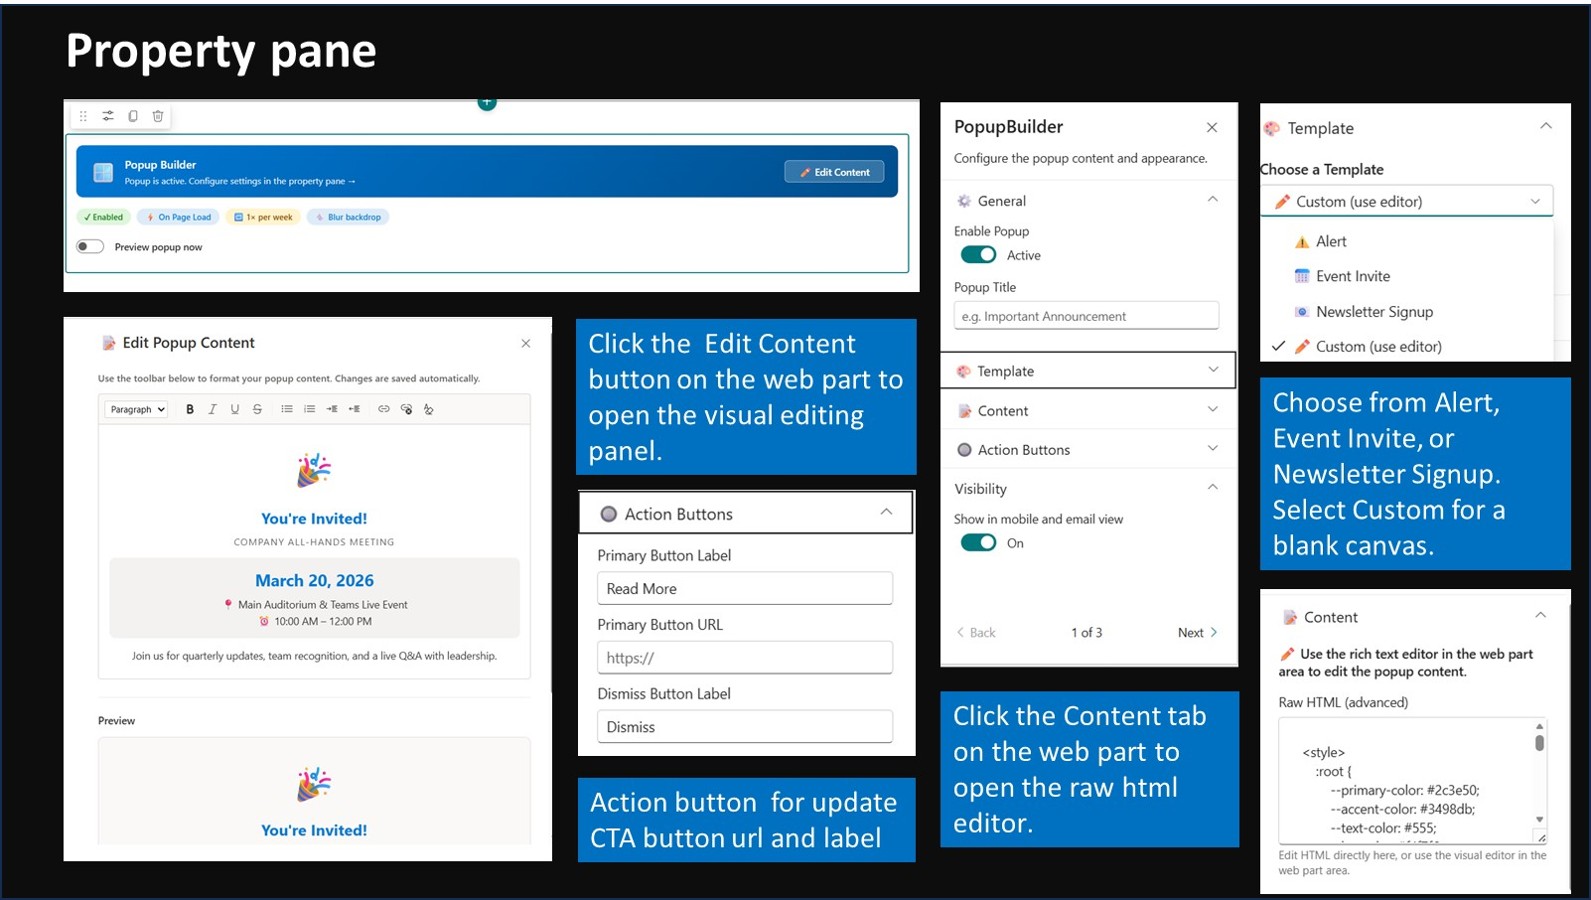
Visual Rich Text Editor: Design your popup content directly in the web part zone.
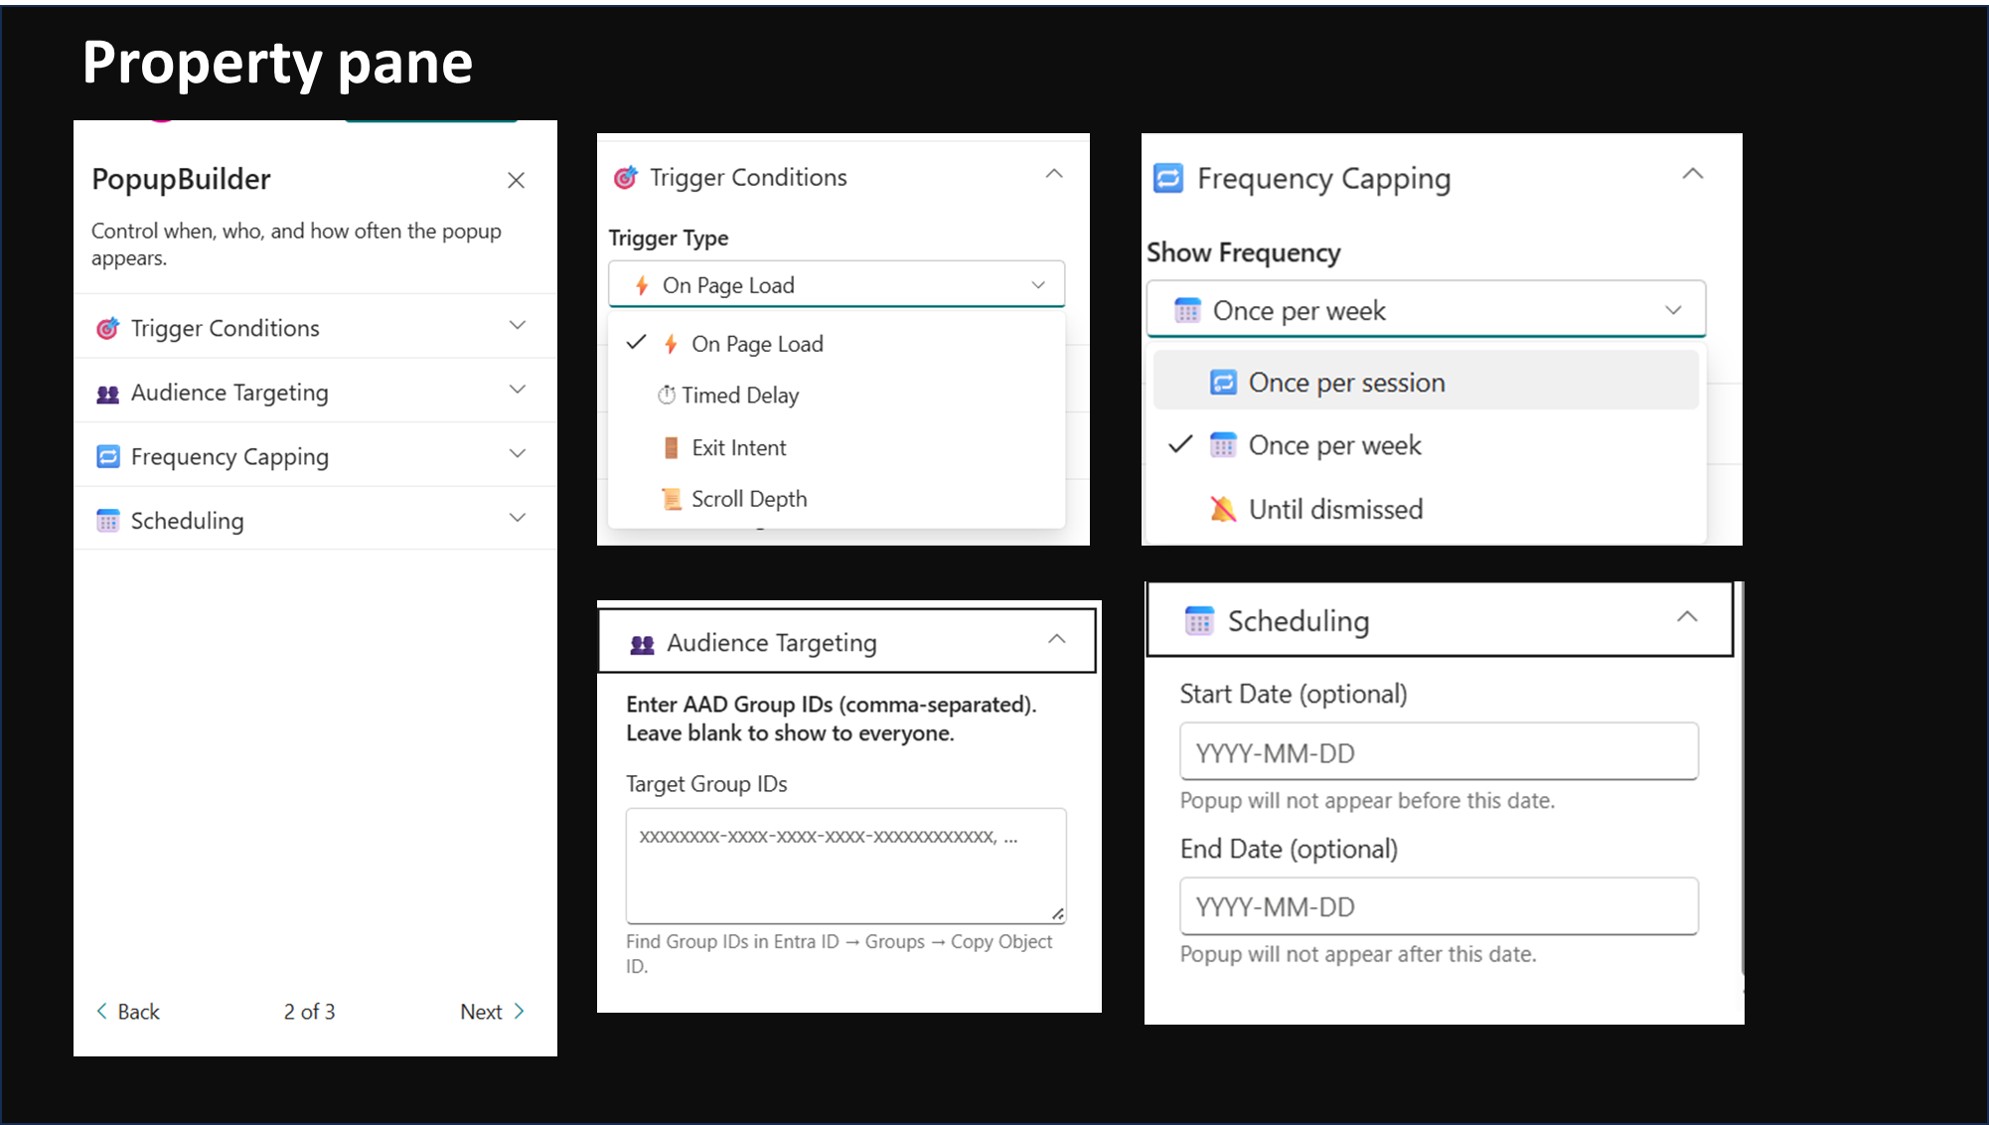
Audience Targeting: Show popups only to specific Microsoft 365 / AAD Groups.
Smart Triggers:
On Page Load: Immediate visibility.
Timed Delay: Appears after $X$ seconds.
Exit Intent: Triggers when the user moves to close the browser tab.
Scroll Depth: Appears once the user has scrolled a specific percentage.Frequency Capping: Control user fatigue (per session, weekly, or until dismissed).
Scheduling: Set automatic start and end dates for campaigns.
Mobile Responsive: Custom layouts optimized for smaller screens.
Accessibility: Built on Fluent UI for full Microsoft standard compatibility.
Property Pane Configuration
The configuration is organized into three primary tabs to streamline your setup process.
Page 1: Content & Basic Setup
| Section | Description |
| General Settings | Toggle Enable Popup (Master Switch) and customize the Popup Title. |
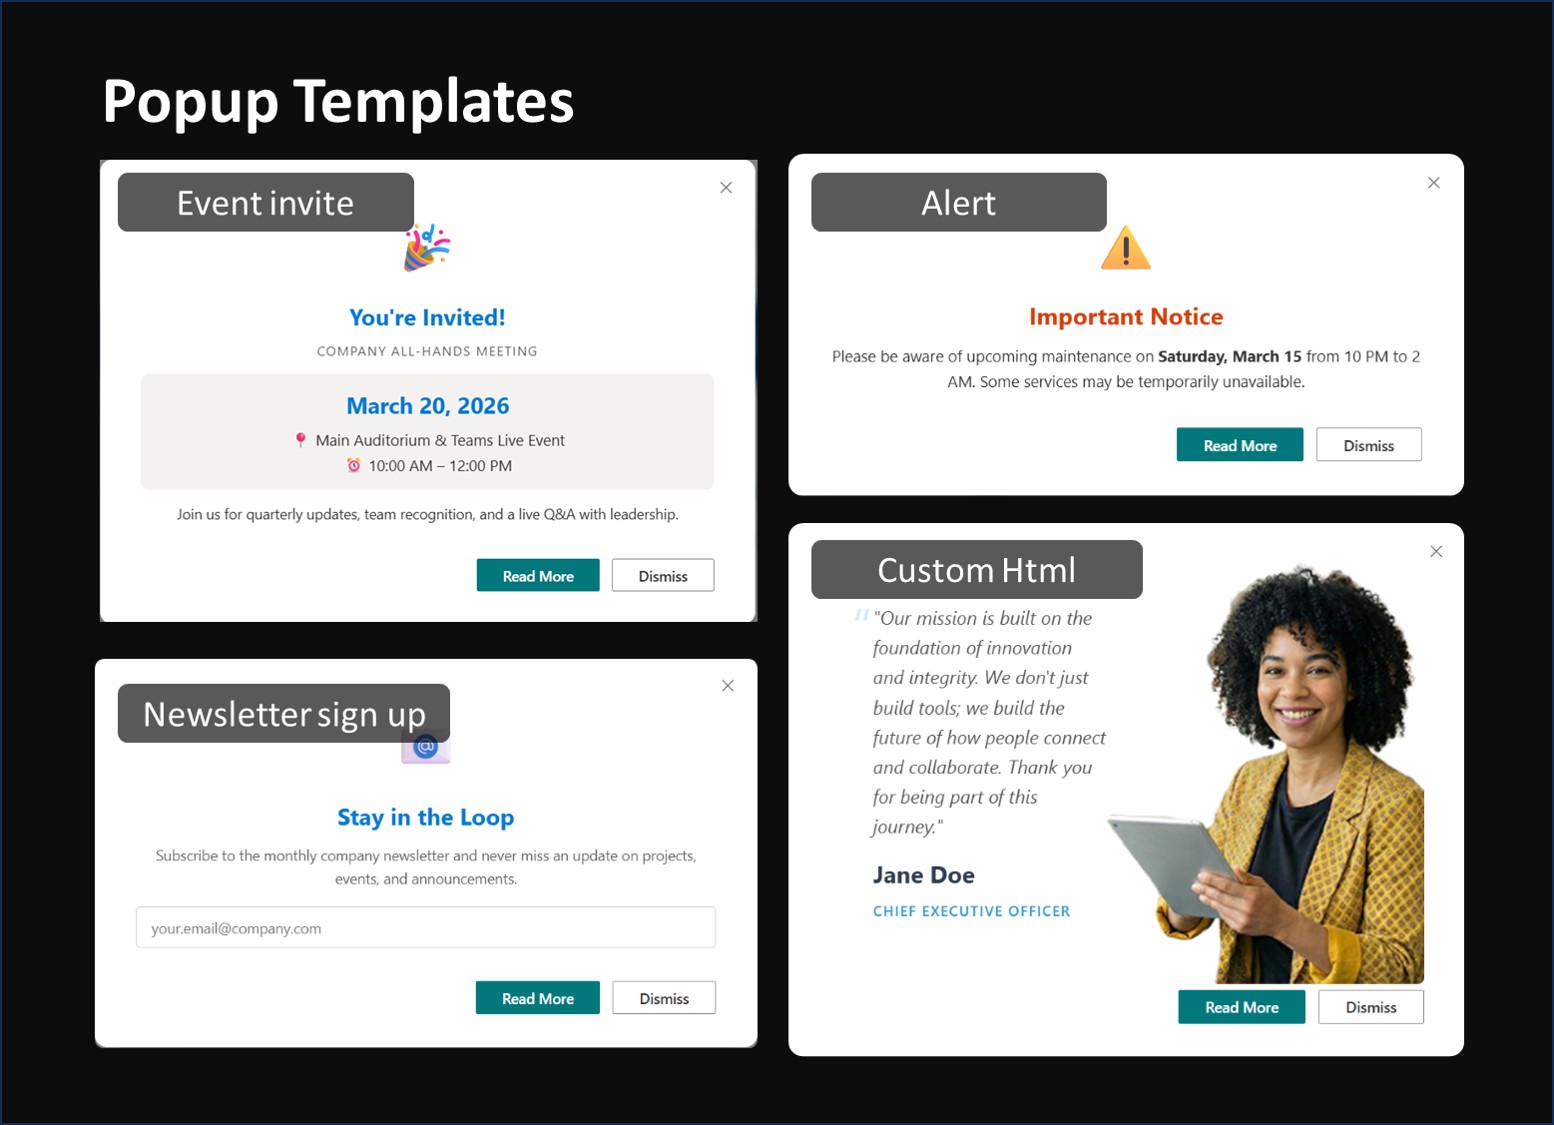
| Template Library | Choose from Alert, Event Invite, or Newsletter Signup. Select Custom for a blank canvas. |
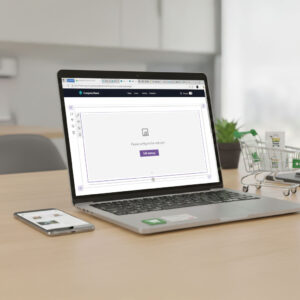
| Content Editor | Click the ✏️ Edit Content button on the web part to open the visual editing panel. |
| Action Buttons | Configure labels and URLs for the Primary (Action) and Secondary (Dismiss) buttons. |
Page 2: Targeting & Logic
Trigger Conditions: Select how the popup is activated.
Pro Tip: Use Scroll Depth (50%) for a non-intrusive user experience.
Audience Targeting: Enter comma-separated AAD Group IDs (Object IDs).
Where to find IDs?: Entra admin center > Groups > Search group > Copy “Object ID”.
Frequency Capping:
Once per session: Resets when the browser is closed.
Once per week: Tracks via browser storage.
Until dismissed: Persistent hide until the user clicks “Dismiss.”
Scheduling: Set ISO format dates (YYYY-MM-DD). The popup will only fire within this range.
Page 3: Visuals & Aesthetics
Visual Settings: Choose animations like Fade In, Slide Up, or Scale Up. Toggle Backdrop Blur for a modern UI feel.
Mobile Preview: View the phone-sized layout. Note: Disable this before saving the page.
Advanced Custom CSS: For developers to inject site-specific branding styles.
Troubleshooting
[!IMPORTANT]
Popup not showing? Check the “Scheduling” dates and ensure the “Enabled” toggle is set to ON.
Previewing while editing: Use the “Preview popup now” toggle in the web part zone to test the UI without leaving Edit Mode.
Audience targeting: Ensure the Group ID is a valid GUID from Entra ID; names or emails will not work.


There are no reviews yet.